----------
|
History - The Hi-Fi Section |
|
| Further Hi-Fi related topics on other pages | |
| Adverts, Articles, DIY Projects, and Reviews from Old Hi-Fi / Recording magazines etc. | |
| A few old, some interesting, Instructions & Manuals etc. | |
| Circuit Diagrams of various equipment. | |
| My first steps along the road of recorded sound ..... | |
|
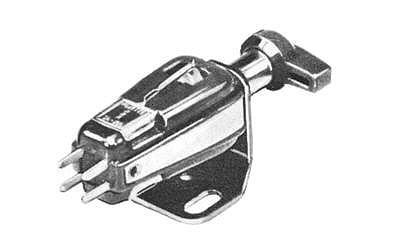
As a young lad of about 12 years old, my parents brought me a second-hand "Fidelity" record player. A typical model from the early 1960's, consisting of a small 7" turntable with a valve amplifier etc, fitted into a small carrying case. After a year or so the unit no longer worked. The amplifier had failed, but the turntable still worked. So I experimented by fitting a cheap Ronette 105 stereo crystal cartridge into the arm. The later purchased from "Radiomatics" of St.Benedicts Street in Norwich (The shop originally started in Oak Street). The gentleman who ran "Radiomatics" was always most helpful and obliging, alas I never got to know his name. So ..... feeding the cartridge output directly into a pair of homemade headphones. The later based around a pair of GPO type 4T receivers (approx' 20 ohms DC) as used in 700 series telephones, mounted in homemade fiberglass ear-cups/headphones. Well, as you would expect, the sound quality was absolutely awful and very quiet, but ..... , and this was the important part, it was the first time I had ever listened to a stereo record and something that I shall never forget. |
|
|
Ronette 105 cartridge |
|
| Happy Days | |
|
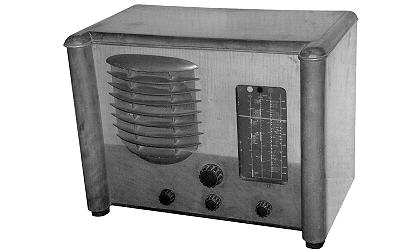
Around the same time, I was given an old Collaro turntable, from a family member, Arthur Shopland. The unit required a little repair work, but it was soon up and running, alas without any of the dreaded auto-changer facilities. The Collaro turntable was mounted in a suitable homemade plinth and utilized the existing Acos GP91-1, mono crystal cartridge (for some reason, I never thought of using the Ronette 105 sterreo cartridge, wired in mono - Oh well). The output from the GP91 cartridge was then connected to "Gram" input of my fathers pride and joy, an old "Sobell" valve radio receiver, type 615. This being purchased by my father in 1948. The Sobell was a wonderful old radio, with excellent Short wave coverage. The output stage is based around one of the famous 6V6 type valves, together with a somewhat small output matching transformer ..... I thought my records sounded wonderful. |
|
| See "Colour picture" of the Sobell receiver, type 615 (Circa 2010) |
My fathers Sobell receiver type 615 |
| So ..... onto my own interest in Hi-Fi etc. | |
|
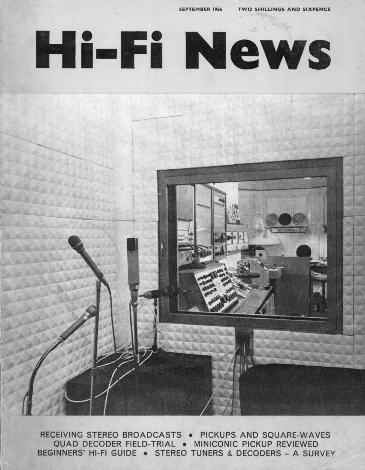
The association between Hi-Fi and Sound Recording, goes "Hand in Hand". This is clearly illustrated by the front cover of an old "Hi-Fi News", dated September 1966. |
|
| My own interest in Hi-Fi ..... when I was about 14 years old. I remember building a very simple "Stereo Amplifier", alas not quite to hi-fi standards, from a article published in "Practical Electronics". The design was based around a pair of Plessey SL403A pre/power amp' (3 Watt RMS) integrated circuits. A next door neighbor, Graham Bateman, then working for the GPO as an engineer, had already built one of these amplifiers to the "Practical Electronics" design, but fitted a pair of the higher powered "Sinclair" IC10 pre/power amp' (5 Watt RMS) integrated circuits, and I was most impressed with it's performance. With some guidance/assistance from Graham, I was soon able to finish my own amplifier, again using a pair of the Sinclair IC10 integrated circuits. My "Homemade" loudspeakers, were based around a pair of the infamous EMI 13" x 8" type drive units, with Eagle CT10 tweeters, mounted in fairly small/inadequate cabinets. The old Collaro turntable had all the auto-changer facilities and existing pick-up arm removed, then the unit was re-sprayed matt black, with brushed aluminum trim to cover unwanted holes in the chassis. A new plinth was constructed, together with a Perspex lid, and the turntable was fitted with a homemade "Gimbal" mounted pick-up arm and a "Sonotone" 9TAHC ceramic cartridge. The pick-up arm being of a design published in the February 1970 issue of Hi-Fi- News. At this time, I was still studying at Costessey Secondary Modern school. Therefore, the pick-up arm was constructed during metalwork classes, being used as a part of the "Practical" work, for my Metalwork GCE O-level exam. My completed DIY stereo system was now ready for use. | |
| See an "Advert" for the Sinclair IC10 integrated circuit |
Note the classic "Telefunken" valve mic'..... close-up ! |
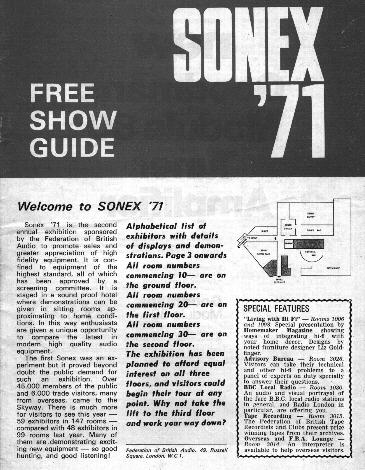
| Graham Bateman, and myself, visited one of the Hi-Fi shows of that time, namely the "Sonex 71", at Heathrow (London), I was totally overwhelmed by the sound, and the cost, of high quality audio equipment. As to the cost of Hi-Fi equipment ..... some 30+ years on, and much of it is still ridiculously as expensive, as it ever was. No change there ! |
|
| So, constructing your own equipment, or modifying cheaper units, seemed the ideal approach. As many of the Hi-Fi related components are of a mechanical nature/design, there is always the opportunity for experiment, and if you have the ability to do so, then why not ? | |
| Whilst "Scanning" the "Sonex 71, Show Guide" cover, for inclusion on this web-site, I found it quite interesting to note the names of manufacturers/suppliers, who were around at that time. Seeing how many companies have survived the test of time, or where the company has continued, but the name may have changed. Sadly, as is inevitable, many of the companies now cease to be in existence. Therefore, for your own reading etc. I have included a "Scan" (Quite Large, 410kB) of the companies listed within the pages of the Sonex 71 guide, together with listing's of their new products that were on display/demonstration at the show. I trust that you will find it interesting. | |
| Sonex 71, Show Guide | |
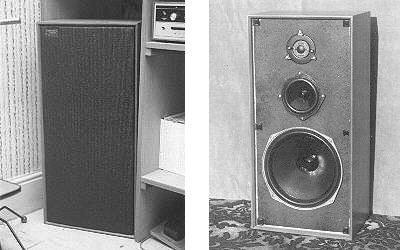
| In the early 1970's, I was to acquire my first "Hi-Fi spec'" set-up. This comprised of an Armstrong 521 pre/power amplifier, together with the Armstrong 524 FM tuner and associated M8 stereo decoder PCB. The later being a discrete component design that preformed very well indeed, as do nearly all of the discrete designs. The turntable was a Goldring-Lenco GL75/P, with it's own L75 pick-up arm. An "Idler Wheel" driven unit, with a continuously variable speed control, 15-18 and 30-86 R.P.M. With adjustable "Click" stops for normal speeds. The cartridge was the Goldring G800E, being a moving magnet deign with an elliptical stylus. I would be listing to the system on a pair of Celestion "Ditton 44" loudspeakers, which were soon mounted on 6" high plinths, to help reduce the low end colouration. All of the above items being purchased from a local Hi-Fi shop, namely "Martins Audio Discount" of Norwich. At last, I was on the first rung of the "Hi-Fi" ladder. |
|
| See the "DX-ing" page, for interests in Long Distance VHF / FM radio reception. | Celestion "Ditton 44" Loudspeakers - Circa 1974 |
|
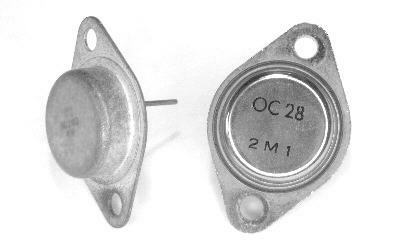
The Armstrong 521 pre/power amplifier, together with the Armstrong 524 FM tuner, sounded fine, but the amplifier was forever "Blowing" the 2 Amp HT fuses, together with "Taking out" the AL102 Output transistors. On a sustained Bass line, the "Pilot" lamp would start to flicker ..... and the next minute, "Pop". Maybe, most definitely, I was expecting too much from the unit ..... however, I always thought that fuses were fitted to help protect the venerable components in equipment. Sadly, in the case of the Armstrong 521, this was obviously not so. The AL102 "Output" transistors were "Germanium", 30 Watt TO3 types, capable of handling 6 Amps, in theory ..... I eventually replaced all four of the AL102 "Output" transistors with the excellent "Mullard" OC28 transistors, and never had anymore problems. Maybe the "Odd" fuse would blow now and then, but that was it. |
|
|
|
AL102 and OC28 "Germanium" power transistors |
|
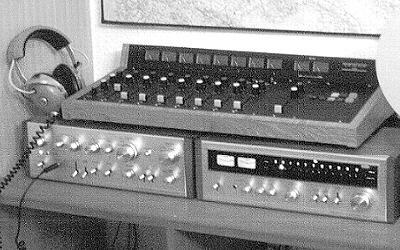
The Armstrong 521 was an excellent amplifier. However, due to the amount of "Auxiliary" equipment being used, I was soon to run out of "Input Sockets". I felt that it was time for a change, with the Armstrong 521 and 524 units, being sold to two of my fellow BT colleges. My latest system would be centered around equipment from the "Pioneer" range. Namely that of the SA-8100 Stereo Amplifier and their "Flagship" TX-9100 Stereo Tuner. I would also have liked the "Matching" Pioneer CTF-7171 cassette deck, but this was out of my budget at this time. The sensitivity and selectivity of the Pioneer TX-9100's FM section, was absolutely wonderful, but I fear that the sound quality of the Armstrong 524 FM tuner, with M8 stereo decoder, was far superior. The sound of the Armstrong 521 Amplifier, also had something that the Pioneer SA-8100 lacked. Both of the "Pioneer" units are still in regular use to-day (2007), despite many "Blown" panel and meter lamps on the TX-9100 tuner. |
|
|
Eventually I found a second-hand CTF-7171 cassette deck, in the late 1980's, to complete my set-up |
"Pioneer" SA-8100 and TX-9100 - Circa 1975 |
| I had always been impressed by the sound from loudspeakers using the "Transmission Line" principle, namely the Cambridge Audio R50 design. Having first listened to the R50 loudspeakers at a talk given by Reg' Williamson, to the Norwich Tape Recording Society, back in the early 1970's. A DIY design published in Hi-Fi Answers, by Chris Rogers, enabled me to construct such a pair of loudspeakers at a reasonable cost. The bass (B139), mid' range (B110) and tweeter (T27) drive units, were manufactured by KEF, whilst the super tweeter (4001G) came from ST&C. The latter, ST&C, are probably better known for their ribbon and dynamic microphones, rather than loudspeaker drive units. The task of constructing these loudspeakers, was awesome, with a high degree of accuracy required in cutting the wood for the transmission line and mid-range enclosure. It would also be a very tedious task, what with using over 100 wood screws in each cabinet and under sealing all internal surfaces (some being very difficult to access). Not forgetting, the "Stringing up" of the various sections of the transmission line, ready to hold the critically weighed lambs wool, for acoustic damping. I found out some years latter, that a very good friend, and work colleague, namely Peter Harradine, had also constructed the same loudspeakers So it was interesting to compare notes on construction problems that we had found, and of course, how they actually sound. My DIY transmission line speakers are still in regular use today, some 30 years since their construction. In all those years, other than rewiring the drive units to the cross-over PCB, I have only ever replaced one of the KEF B139's, that failed by going "open-circuit". |
|
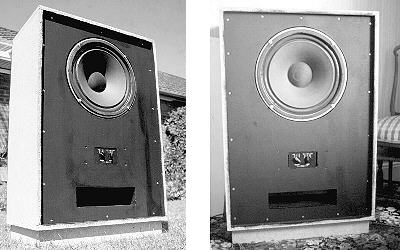
| DIY "Transmission Line" loudspeakers - Circa 1975 | |
|
The turntable then in use, still being a Goldring-Lenco GL75/P, with a history of different cartridges. Ranging from the "Goldring" G800E, through to the ever popular "Shure" M75ED. In 1976, the "Lenco" L75 arm was removed, and after some modification to the GL75 metalwork, I fitted the ever popular SME 3009 mkII pick-up arm. Together with a Shure V15/III moving magnet cartridge. This was much better ! Within a few months, I purchased a second-hand "Garrard" 401 transcription unit, fitted with a SME 3009 pick-up arm. I utilized my Shure V15/III cartridge (from the modified GL75) with the 401/SME combination. Compared to my GL75/SME/V15 combination, there was a loss of something. What, I could not say, but something seemed to have been lost in the change. I tried various cartridges in the Garrard 401/SME 3009 combination, but I was never really that happy with the results. |
|
| The Garrard 401, with SME 3009 pick-up arm | |
|
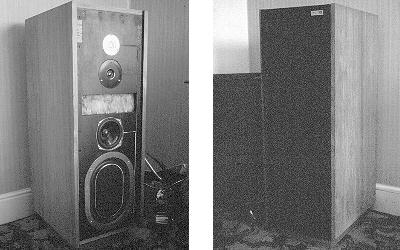
As impressed, and satisfied, as I was with the homemade transmission line loudspeakers ..... I was to be introduced to some large "Tannoy" loudspeakers. Well, that was something else. Maybe not so clean as the transmission line loudspeakers, but these Tannoy "Arden's" were absolutely enchanting. It was not too long before I built a pair of these monsters. A ported cabinet design, based around the Tannoy HPD385 15" dual concentric drive unit. Once the cabinets were constructed and the drive units fitted (prior to finishing off the cabinets cosmetically) they were brought in, from the workshop, for listing tests. Sadly, I liked the sound so much, that the loudspeakers never got taken back to the workshop for veneering or having the grill cloths fitted. I recall a friend, Mike Green, calling round to have a listen to the DIY Arden's, and his wife, Valerie, saying that the DIY Arden's looked more like two large washing machines, rather then loudspeakers ! |
|
| See an "Advert" for the Tannoy "Arden" Loudspeakers | DIY Tannoy "Arden" loudspeakers - Circa 1977 |
|
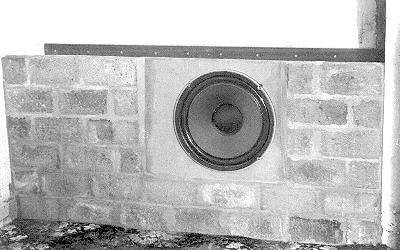
The DIY Tannoy "Arden's" were fine loudspeakers, but as time went by, I wanted a cleaner bass response. Currently, the Tannoy arden's were free standing in alcoves, either side of the fireplace. Now .... if I utilized the wall's of the alcoves, then I could build some unobtrusive, yet large and solid enclosures. The internal volume of the enclosures would be 2-3 times greater then that of the original "Arden" design, thus offering greater bass extension. I would utilize the solid concrete floor, for the base of the enclosure, with the sides and back, being the existing walls around the alcove. A new, short wall, would be required for the front of the enclosure, constructed from "Solid" concrete building blocks. The baffle board, for the loudspeaker assembly, was cast in concrete, reinforced with a steel mesh. As the drive units were quite close to the floor, the concrete baffle boards were mounted at an angle, to help project the sound upwards i.e. to arrive at ear level in the listing position. The top of the enclosure, would be constructed from paving slabs, covered with "Veneered" chipboard shelving on the top. These enclosures worked very well indeed and looked quite unobtrusive in the listing room. One of the many things that I missed, when moving to Leicestershire, was not being able to take the "Alcove" enclosures with me ! |
|
|
Tannoy HPD385 drive unit, in "Alcove" enclosure |
|
|
So it's back to turntables ..... The "Modified" GL75/SME 3009 mkII was an excellent turntable, but I fancied the idea of a "Unipivot" arm. In 1979, both myself and a college from BT, namely Tony Milk of BMX fame, each constructed a "Unipivot" arm from a design published in the July 1968 issue of Hi-Fi News. Incorporating our own "Minimalist" design changes and requirements. We machined the required parts using Tony's excellent, back garden, workshop facilities. Both his time, and use of machinery, being very much appreciated. Tony combined his "Unipivot" arm with a Decca London cartridge and Garrard 301 turntable. I fitted my "Unipivot" arm, complete with Shure V15/III cartridge, onto the "Modified" GL75, in place of the SME 3009. A sonic improvement was immediately noticed. However, the turntable/arm coupling was far from ideal, and when you consider how minutely small the information on the record is, it makes sense not to have any "Slack" in the system. Ideally, from the stylus tip, back through the whole system of arm/plinth/bearing/turntable to the record surface, there should be no "Slack/Free-Play" call it what you will. |
|
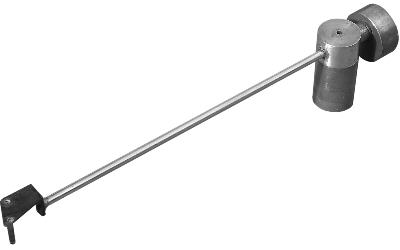
| I still have the DIY "Unipivot" arm (Circa 2010), alas it is in need of some cleaning etc. Maybe a future project is required ..... |
DIY "Unipivot" arm featuring a strong, yet lightweight, copper clad fibre-glass (PCB) cartridge carrier |
|
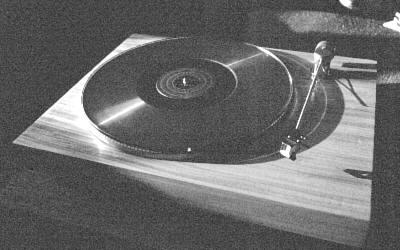
So, to the second modification ..... I removed the GL75 turntable from the original plinth, and set to cut away as much metalwork as possible. Leaving just the bearing and motor/idler wheel assembly behind. The base of the bearing assembly being rigidly supported to the metal base plate via three metal braces. Therefore not allowing the turntable platter to rock in any plain. This was then "Securely" re-fitted to a solid 3" (75mm) thick "High Density" Chipboard, Sandwiched, plinth. Together with the homemade unipivot arm. I had a 3/8" (10mm) thick "Glass" platter made, and I constructed a heavy "Balanced" weight, for clamping the record to the platter. The new modifications helping to make a "Rigid" coupling between the record, turntable, arm and Shure V15/III cartridge. The combination worked wonderfully well, and looked quite stylish for the time (Circa 1979). After this modification, the quality and feel of the sound, improved greatly. The tempo of the music came across with more feeling and emotion. You just had to tap your feet. Alas, from a DIY view point, this was about the best sound quality that I could extract from my V15/III in this combination ..... or was it ? |
|
| Colour picture (Poor Quality, but it is the only one that I have) of GL75 / "Unipivot" arm / Shure V15/III |
GL75 motor/turntable & "Unipivot" arm / Shure V15/III (Controls recessed under the front edge of the plinth) |
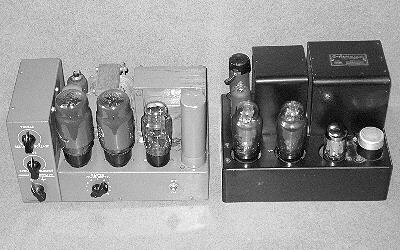
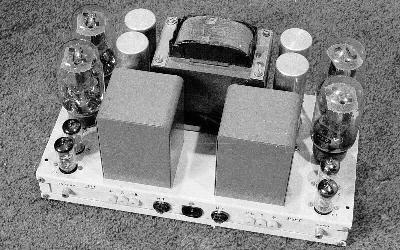
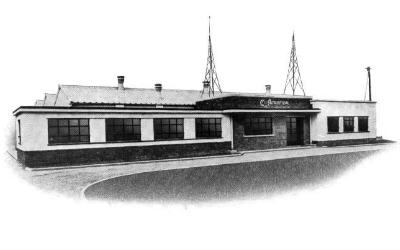
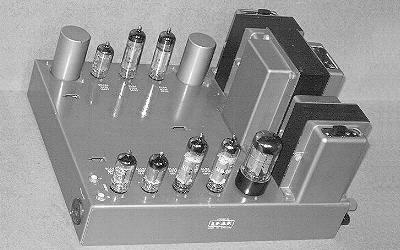
| Valve amplifiers ..... the famous name "QUAD", derived from Quality Unit Audio - Domestic, was originally known as "The Acoustical Manufacturing Co. Ltd" and produced many various pieces of Hi-Fi equipment under the "The Acoustical Manufacturing Co." name e.g. the QA12/P pre/power amplifier combination. The letters QA standing for Quality Audio. The QA12/P was followed by the Quad 1 power amplifier, together with the associated QC1 pre-amplifier (Control Unit). I was given the opportunity of trying out a "Quad 1" power amplifier, this being the forerunner of the famous "Quad II" power amplifier. The "Quad 1" power amplifier sounded absolutely amazing. This was the first valve amplifier that I had used with my speakers and input sources. I was totally smitten by it. Now, looking back, in comparison to the "Quad II" power amplifier, I feel that the "Quad 1" was a better sounding amplifier. |
|
|
|
"QA12/P" and "Quad 1", valve amplifiers |
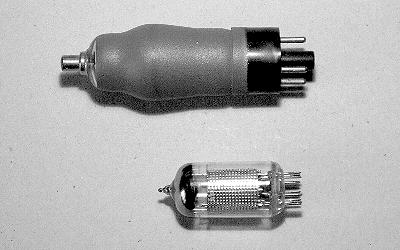
| So, why do the Quad 1 and Quad II "Appear" to sound so different ..... well I personally think this is due to the EF36 input/phase splitter valves used in the "Quad 1" design. I have since had the opportunity to swap the EF86 valves, in the Quad II power amplifier, with EF36 type valves, together with the necessary component changes etc. The audible difference, in my opinion an "Improvement", being very noticeable and most desirable. For some reason, the older "Medium Sized" signal Pentode and Triode type valves, such as the EF36, sounded far better then their modern, "Smaller", replacements e.g. EF86. The EF36 "Appears" to give a fuller sound, with more dynamic impact, and a grainy/edgy quality. Both of these qualities would appear to emphasize the separation, between the music and the silence, far better then that when using smaller EF86 type valve. |
|
| EF36 (upper) and EF86 (lower) type valves | |
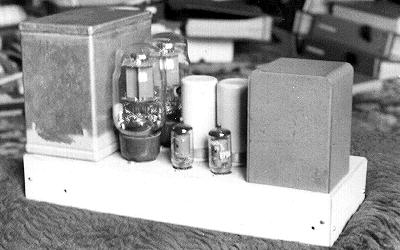
| I decided to have a go at building a clone of the Quad II power amp' design, as some of the valves in the Quad I power amp', were that much more difficult to obtain. The DIY version, of the Quad II valve power amplifier, was to be used purely for "Tests" and "Experimentation". Therefore various "Extras" were fitted, such as the feedback selection switch. Thus allowing instant comparisons between "Ordinary" and "Active" feedback options. The final version of the DIY amplifier might not have looked very good cosmetically, but it satisfied all of the requirement asked of it and sounded absolutely fine. The "Feedback" arrangement used on the Quad design, works on a "Single" closed loop system. Feedback is taken from a tap on the output transformer, back to the phase splitter stage of the amplifier. I experimented with the idea of taking the feedback directly from the loudspeaker (crossover input) end of the loudspeaker cables i.e. both the signal and earth leads. Thus allowing for loss and irregularities in the cable between the amplifier and the loudspeaker. After a bit of fiddling around with component values, a satisfactory result was eventually found. The results were most impressive. The control over the audio signal was much "Tighter", with a really clean and solid bass response. Together with a very "Open" top end. |
|
| See the "Active" feedback circuit diagram. | Original DIY version of "Quad II" valve power amplifier |
| Now knowing that it was possible to recreate that "Quad" sound, via DIY, it was time to build a stereo version on a single chassis. The layout looking either like the Radford STA25 or Leak Stereo 20. I had always liked the looks of the Radford, so I decided to go down that avenue of design. Layout of the wound components, such as the mains transformer, was critical. In an attempt to keep "Mains Hum" to a minimum. Again, the end results were very pleasing. The stereo DIY amplifier was to end up using my modified "Active" feedback arrangement, as tried out on the mono DIY amplifier. I decided to use the wonderful E80F, rather then using the standard EF86 valves, for the input/phase splitter part of the circuit. The E80F's draw more current for the heaters, but the mains transformer used in the DIY design, had sufficient headroom to allow for this. The overall sound was amazing, and when listing to recordings made using simple microphone techniques, the depth of the stereo image was absolutely fantastic. This was especially true, on recordings using a single pair of microphones, using the "Middle and Side" technique. |
|
| DIY "Stereo" version of the "Quad II" valve power amplifier | |
| On the subject of valve amplifiers ….. Having been a Hi-Fi "Fanatic" for more years then I care to remember, I have built up a vast collection of various pieces of Hi-Fi equipment. As space is at a premium, isn't it always, I decided to collect smaller items of Hi-Fi i.e. Amplifiers/Cartridges/Pick-up Arms, etc. If I were to have collected loudspeakers and turntables etc, then I would need to live in an Aircraft Hanger, rather then a House. So, the majority of HI-Fi units that I have collected are from the 1950's and 60's, together with some early 70's units. It seems, that once you "Acquire" a particular piece of equipment, say a pair of QUAD 11 power amplifiers and the associated QUAD 22 control unit, then for some reason, you have this compulsion to start "Collecting" other products from the same manufacturer. This is a sad, but very true fact, as I am sure many of us would admit. My first piece of QUAD equipment, was the QUAD 1 power amplifier and the associated QC1 control unit. This was quite quickly followed by a QUAD 11 power amplifier and the Mono QC11 control unit (as used by the BBC), together with QUAD AM and FM tuners. In the mid' 1980's, I was fortunate to track down a working example of the early QA12/P (combined pre/power amplifier), complete with the original "Invoice". For all my efforts, I now have working examples of almost every "Valve" based product that QUAD manufactured through to the 1970's. |
|
| See "Index > Quad" for pictures of the same. | The Acoustical Manufacturing Co. Ltd, Huntington, England |
| Unfortunately, collecting doesn't stop with just one manufacturer. Now that I had acquired the majority of QUAD valve amplifiers, I was very enthusiastic about listening to, and acquiring, other makes. The next amplifier that I would purchase, was to be from "Leak" range. This was purely due to the amount of Leak valve equipment available on the second-hand market at the time. My first "Leak" amplifier would be the "Stereo 20", together with an associated control unit. I remember the purchase very well. I was on holiday in Leicestershire and saw an advert in a "Local" Newspaper. The Leak equipment was mounted in a Record Housing "Lowflex" Hi-Fi cabinet, together with an Ampex 750 reel-to-reel tape deck and Garrard 301 turntable, with Decca arm and cartridge (The Hi-Fi cabinet is still in daily use). The whole lot cost me £60, back in 1981. With the Hi-Fi cabinet securely tied and strapped to the roof rack of my ancient Ford Escort MkI, all I had to do was to get it all back home to Norfolk, some 120 miles away. Stopping every so often, to check that all was still safe and secure. Note that the Hi-Fi units were safely packed in boxes, on the back seat of my car during the trip. Other than a few dirty contacts, all the equipment was in perfect working order. More "Leak" equipment was to be purchased, and over the years I managed to build up an interesting, though not vast, collection of Leak "Valve" equipment. |
|
| See "Index > Leak" for pictures of the same. | LEAK "Stereo 20" valve power amplifier |
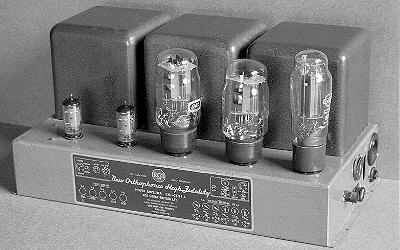
| There where of course, many other manufacturers of valve amplifiers. I was fortunate enough to listen to a Radford STA15 amplifier, in a very good system. This amplifier sounded superb, with a sweet yet exciting sound. I have looked for an STA15, even the Mono version i.e.MA15, but with no joy. It would appear, that anybody who has these amplifiers, wants to keep them ….. I wonder why. Eventually I found a Radford STA25 amplifier, sounding somewhat more "Clinical" than the STA15, but still a very good amplifier. One of the reasons for a difference in sound quality, could be that the STA15 amplifier use's a "Valve" rectifier for the HT supply, whereas the STA25 amplifier use's a "Solid State" type. I have never been very impressed with "Valve" audio equipment that utilises "Solid State" rectifiers in the HT circuit. More often than not, they appear to sound "Gritty" or "Rougher", then those using Valves for HT rectification. Therefore, at some time in the future, I intend experimenting with a "Valve" rectifier in the STA25 amplifier, and see if that "Sweetens" up the sound. Finally, an "Odd Ball" in my collection is the RCA "Orthophonic" amplifier, complete with it's associated pre-amplifier/control unit. It maybe an unfair statement to make, but I always think of the RCA power amplifier, as being an "Over sized" mutated version of the Quad II power amplifier ….. However, the RCA looks very smart and tidy. |
|
| RCA "Orthophonic" valve power amplifier | |
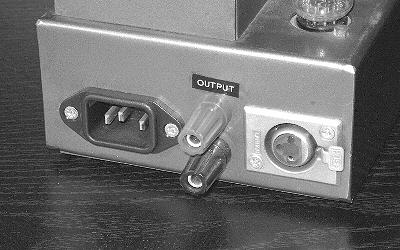
| So ..... the QUAD 11 is a great amplifier, but it should be remembered that the amplifier is intended/designed for use with other QUAD control units. Therefore, when the QUAD 11 is used with other pre-amplifiers etc, then a few modifications should be considered, especially in the interests of Safety. Ideally the QUAD 11 should be fitted with a modern mains socket, such as an IEC type, thus providing the amplifier with it's own good/safe earth point (This also applies to many other makes of old equipment). By enlarging the hole used by the original "Bulgen" type, two pin mains connector, then sufficient space is available, to fit an IEC type socket. I would suggest the use of screened cable, for the mains feed inside the amplifier, to help reduce hum pick-up. The "Rectangular" multi-way connector, used to connect the QUAD 11 to other QUAD units, is not required when the amplifier is to be used with pre-amplifiers from other manufacturers. Removing the multi-way connector, and the associated internal wiring, allows a "3-pin Cannon" type socket to be fitted neatly in it's place. Thus offering a good quality, reliable connection to the outside world. Finally, the speaker connectors can easily be up-graded to "4mm Binding Post" types, together with good quality "High density" multi-thin-strand "Speaker wire" to the output transformer connections. |
|
| See "Close-up" picture of the modifications. | QUAD 11 amplifier, connector modifications |
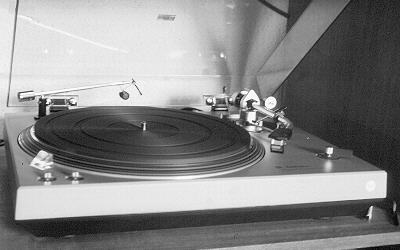
| Meanwhile, back to the Hi-Fi set-up ….. The next change was to be the turntable and arm combination. I was currently using the "Modified" Goldring GL75 motor/turntable and DIY "Unipivot" arm, together with the Shure V15/III cartridge. An excellent combination, but one that could be improved on, or so I thought. I purchased a Technics SL150, Direct Drive, turntable. The associated plinth was designed to accommodate an SME 3009 arm. So, having fitted the SME arm and an Ortofon SL20E, moving coil cartridge, together with the associated DIY pre-amplifier, I was ready for the first listening test. Oh dear, what a disappointment. I changed the cartridge, back to the Shure V15/III, and alas, I was still not very impressed. It would seem that the "Modified" Goldring GL75 motor/turntable and DIY "Unipivot" arm, sounded far superior than the Technics and SME combination. |
|
| Technics SL150 and SME3009 combination | |
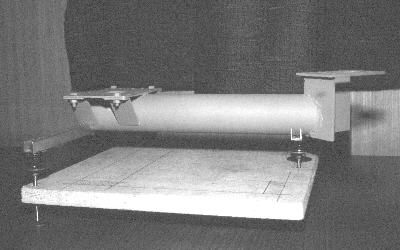
| Some kind of drastic action was required. I decided to strip the Technics SL150 down to component level i.e. The motor/main bearing, with it's control PCB, and the turntable platter. I then designed and constructed a suitable "Floating Sub-Chassis". This would be used to mount the motor/main bearing and SME 3012, 12" arm. The "Floating Sub-Chassis" was constructed from a combination of 1/8" (3mm) thick steel plates and 2" (50mm) diameter, thick walled, steel tubing. The later item being filled with an expanded polystyrene material, to "Attenuate" any resonance. These components were welded together, to form a rigid chassis for the motor and arm combination. The turntable was given additional mass, in the form of resin mixed with stone-dust. Then being "Dynamically" re-balanced before use. This additional mass, making the unit somewhat slow to reach the correct speed, but helping to minimize the "Hunting" effect, associated with direct drive turntables. |
|
|
Construction of "Floating Sub-Chassis" - Circa 1979 |
|
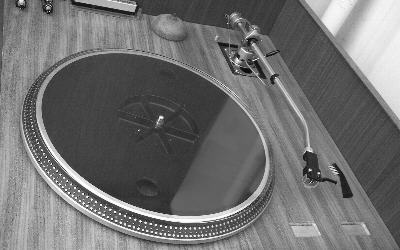
| The "Finished Turntable/Arm Combination" was fitted with a Denon DL103 cartridge, with a "Special" Van-de-Hul stylus, feeding into a DIY moving coil pre-amplifier. The later, being from a design published in the December 1979 issue of Hi-Fi- News. The overall sound quality was very good, but I still thought it could be improved upon. The moving coil pre-amplifier was powered by a conventional transformer/bridge rectifier/smoothing capacitor type power supply. Alas, this was not allowing the moving coil pre-amplifier to work to it's best. A new power supply was built, this time with the inclusion of chokes in the supply rail, much like that of a valve amplifier design. The internal impedance of the power supply was now so high, that the moving coil pre-amplifier required a 30 second "warm-up" time. The audible/sonic difference was stunning. The dynamics were greatly improved, as was the imaging and depth. There was an "Openness" and "Ease" that was previously lacking.. |
|
| See the "Moving Coil Pre-amplifier" DIY article |
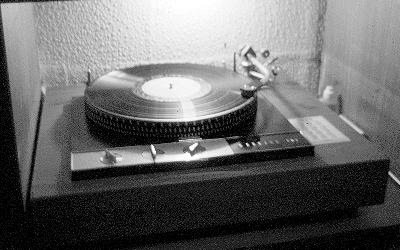
Technics SL150 and SME3012 - Circa 1980 |
|
|
|
| Looking back at the various turntable/arm/cartridge combinations I have had the fortune to use, I now know what my personal "Dream" combination would be. | |
| So ..... one day, maybe, I will try the "Modified" GL75 turntable and DIY unipivot arm combination, with the Denon DL103 moving coil cartridge. Together with the Hi-FI News "Moving Coil" pre-amplifier and my power supply. | |
|
|
|
| Interesting / Useful ..... Various Audio Equipment circuit diagrams | |
|
|
|
|
|
|
